Installing WordPress on your Hostinger live server is straightforward, even if the interface might look slightly different each time you log in. Hosting providers often update their platforms, but don’t worry—the basic concept remains the same!
Generally, you’ll always:
- Log in to your hosting dashboard.
- Find an option like ‘Auto Installer’ or ‘WordPress Installer.’
- Enter your website details and credentials.
- Initiate the installation and let the hosting platform do the rest.
Topics Covered
🎯 Need Personal Help Deciding Which Hosting is Best for You?
I know—there’s a lot of information here! If you’re still not sure about which host to choose (or which plan to purchase), you’ve got two choices:
👉 1. Just want the best discounts for speedy, trustworthy budget hosting?
If getting a budget hosting which is reputable, reliable, trustworthy and will keep your website fast, secure and optimized you can connect with me. I can get you exclusive deals on hosting providers for free. Justclick the link below, fill out a small form, I will personally help you avail the discounts for free.
🔗 Click here to avail discounts!
👉 2. Want discounts + 1-on-1 setup help?
If you want me to help you pick the perfect plan, guide you on the right hosting setup, so that you don’t overpay and underpay for the type of website you want to build and even install WordPress for you,
🔗 Go for 1-on-1 Session + Setup Help
Watch This Video for a Step-by-Step Guide
To help you navigate easily, we’ve created a quick video tutorial:
Blogs
- Factors to consider for Selecting Right Hosting for Your Website
- Choosing the Right Platform for Your Website
- Step By Step Guide – Choose the Right Hosting for Your Website
- Understanding the Different Types of Hosting (Detailed Guide)
Here’s a clear breakdown, illustrated with images for each step, making it easy to follow along:
Step-by-Step Guide to Installing WordPress on Hostinger
Step 1: Start Your Setup
Choose who the website is for—yourself or someone else.

Step 2: Select Website Action
Decide whether you want to create a new website or migrate an existing one.

Step 3: Choose WordPress
Select WordPress as your preferred platform.
Step 4: Enter Your Login Details
Provide your admin email and create a secure password.

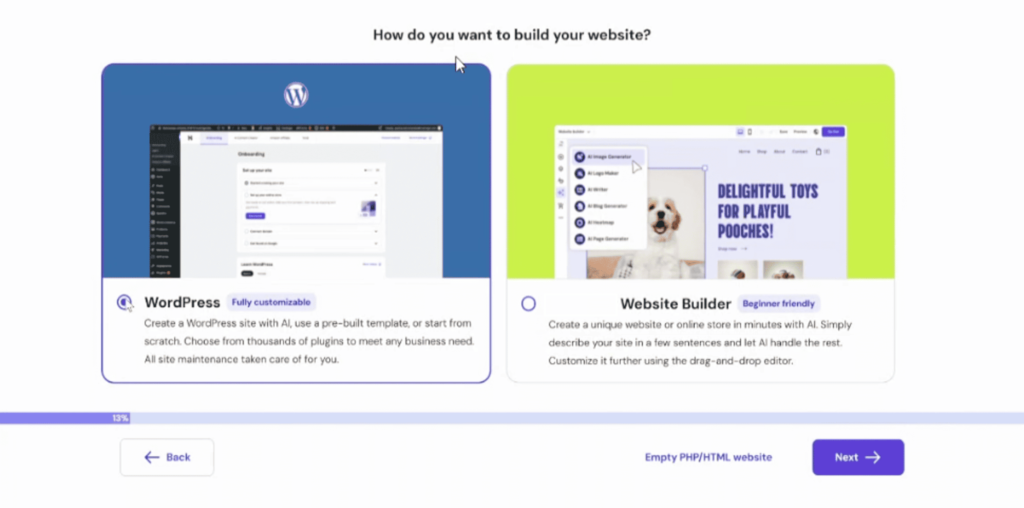
Step 5: Select Your Website Building Method
Pick between AI-assisted creation or using pre-built websites and themes.

Step 6: Choose Your Domain
Enter your chosen domain or pick a temporary domain provided by Hostinger.

Step 7: Domain Registration
Confirm your primary information for domain registration.

Step 8: Complete Your Contact Information
Provide detailed contact information to finalize your domain setup. !

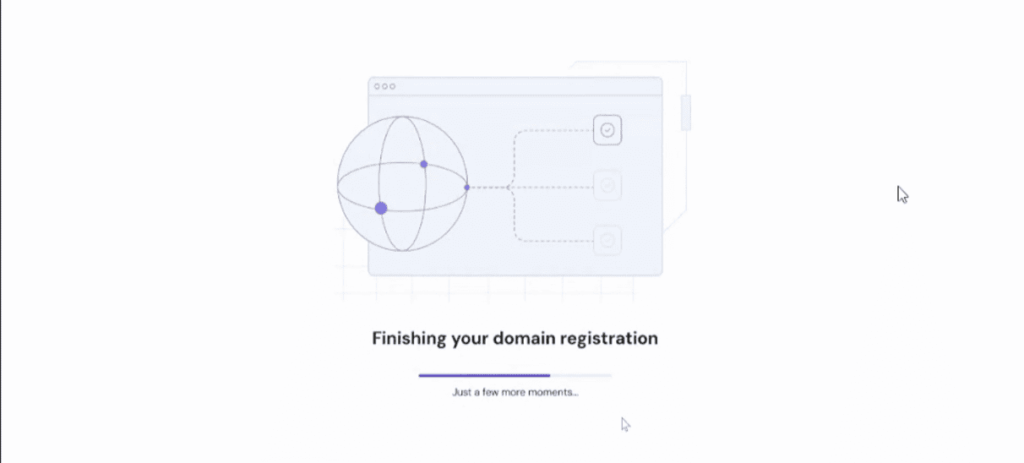
Step 9: Finalizing Domain Registration
Allow a few moments for Hostinger to complete domain registration. !
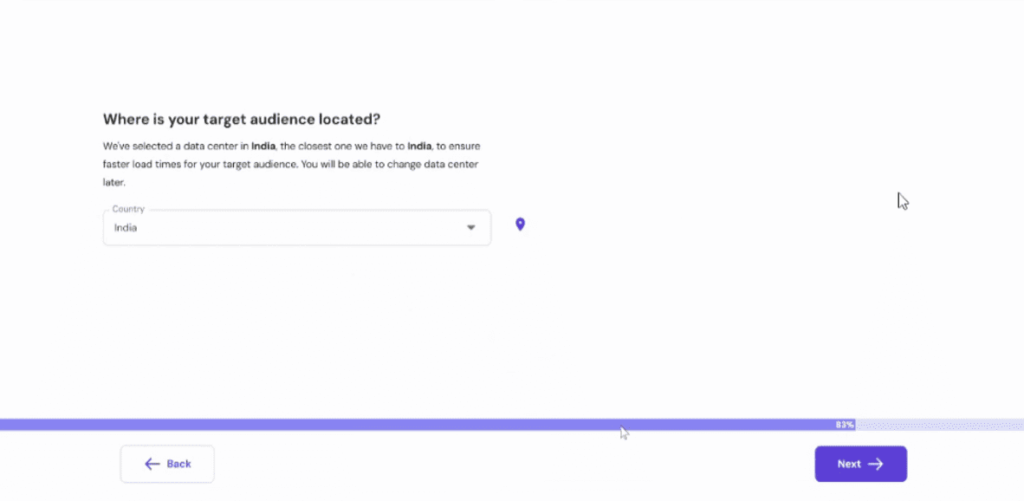
Step 10: Select Target Audience Location
Define where your primary audience is located to optimize site performance.
Step 11: Installing WordPress
Wait a few moments while WordPress is installed. !

Step 12: WordPress Dashboard Access
After installation, access your new WordPress dashboard to start customizing your website.

Enjoy setting up your website!
Conclusion
You’ve successfully installed WordPress and are ready to start building your website. Remember, WordPress is incredibly flexible, so feel free to explore themes, plugins, and customization options to create the site you’ve envisioned. If you encounter any questions along the way, revisit this guide or reach out for help. Happy building!
Get the latest blogs and insights straight to your inbox !
We will keep you updated with the latest tips, tricks, hacks and learning material. Join us and enrich your world with great learning.